
Girl’s Rainbow Bedroom

This post may contain affiliate links.
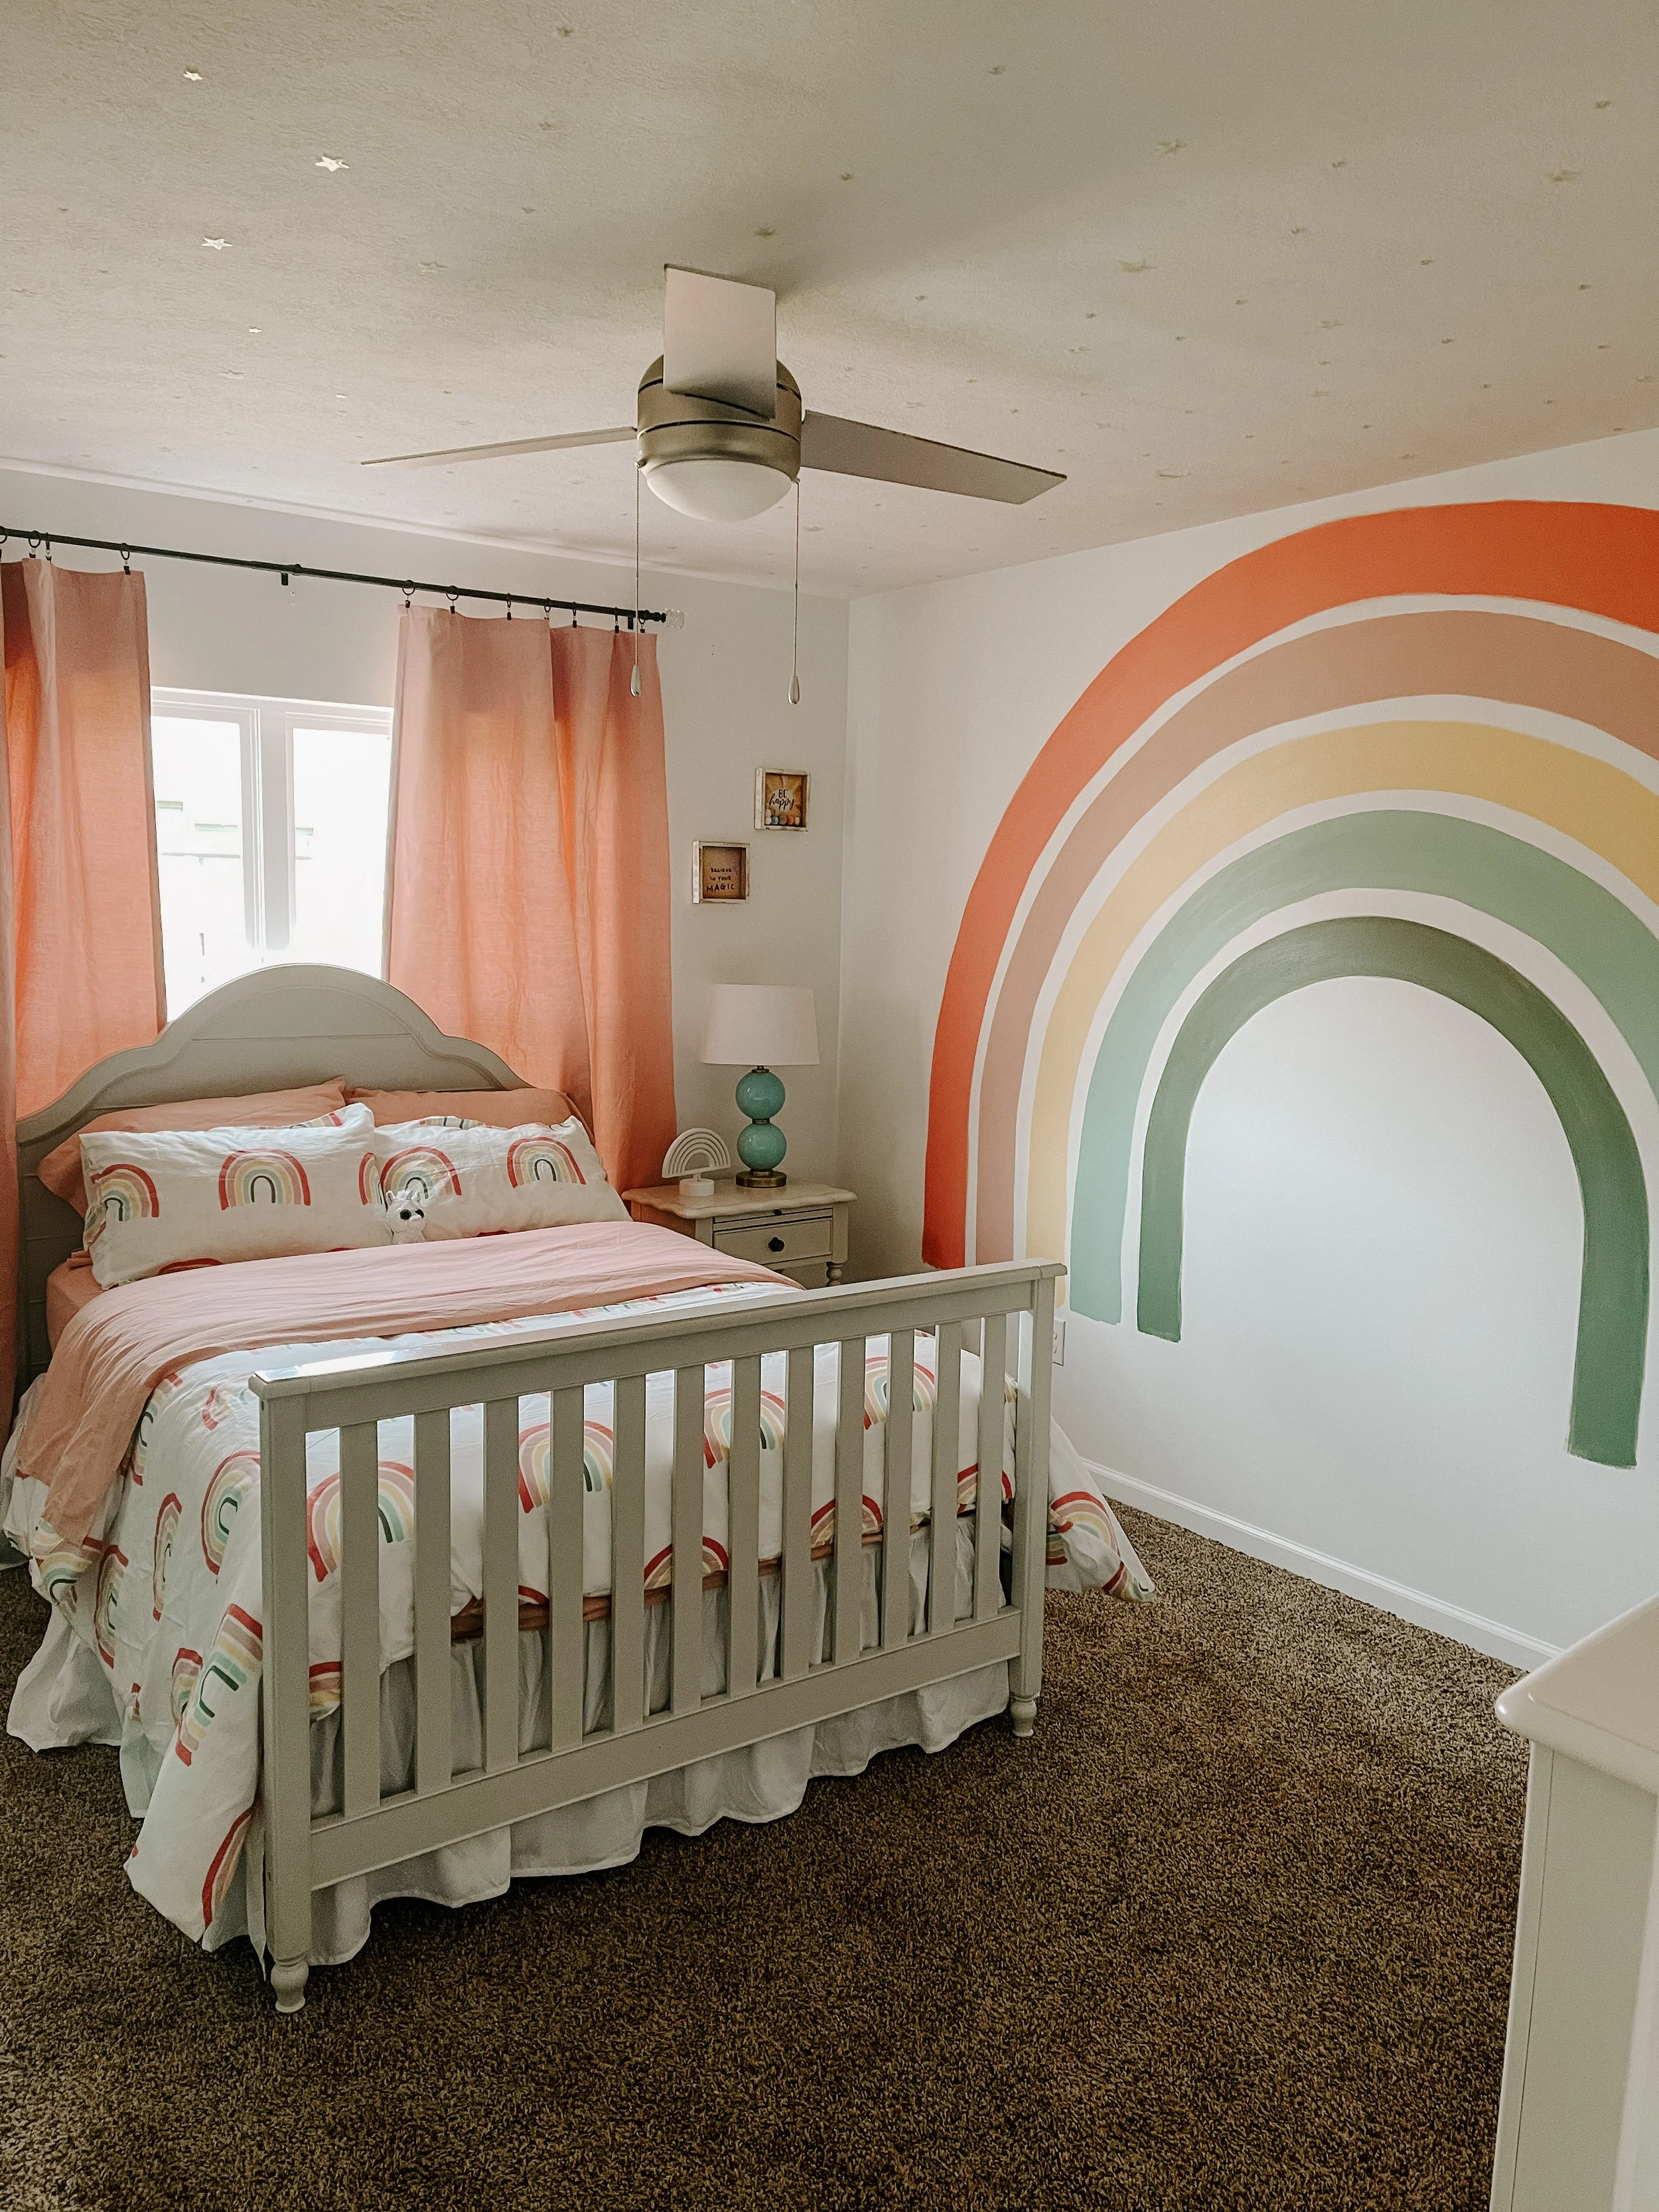
Last year we surprised our daughter by re-doing her bedroom & transforming into a magical rainbow sanctuary. We sent her off to spend the weekend with grandma & grandpa and then Chance and I got to work!
I ordered the new bedding from Amazon. After looking all over the internet I found this print & it was by far my favorite and reasonably priced too! It comes with a cover and two shams. If you decide to purchase this bedding, please know that it is a duvet cover so you will need a duvet insert.
I found this one from Amazon and I like it so much better than the one we have on our king bed!
It has anchor loops on the corners for the duvet insert to stay attached to the duvet cover. BIG WIN!
It has weight to it, but it doesn’t get hot.
Easy to wash!
It’s fluffy & comfy!
When you get the duvet in the mail it’s wrapped up so tiny and flat. Just throw it in the dryer for a bit and it’ll fluff right up!

The next step of the project was to decide on paint colors. My plan was to paint a giant rainbow on the largest wall in the room. I pinned so much inspiration on Pinterest & how to do it. I was confident I’d be able to pull it off I just needed colors. I took one of the shams and went to Sherwin-Williams to color match the rainbow. After an hour in the store, I found the perfect shades to match the duvet! See Below!
SW 6591 - Amaryllis
SW 6303 - Rose Colored
SW 6674 - Jonquil
SW 6457 - Kind Green
SW 6193 - Privilege Green

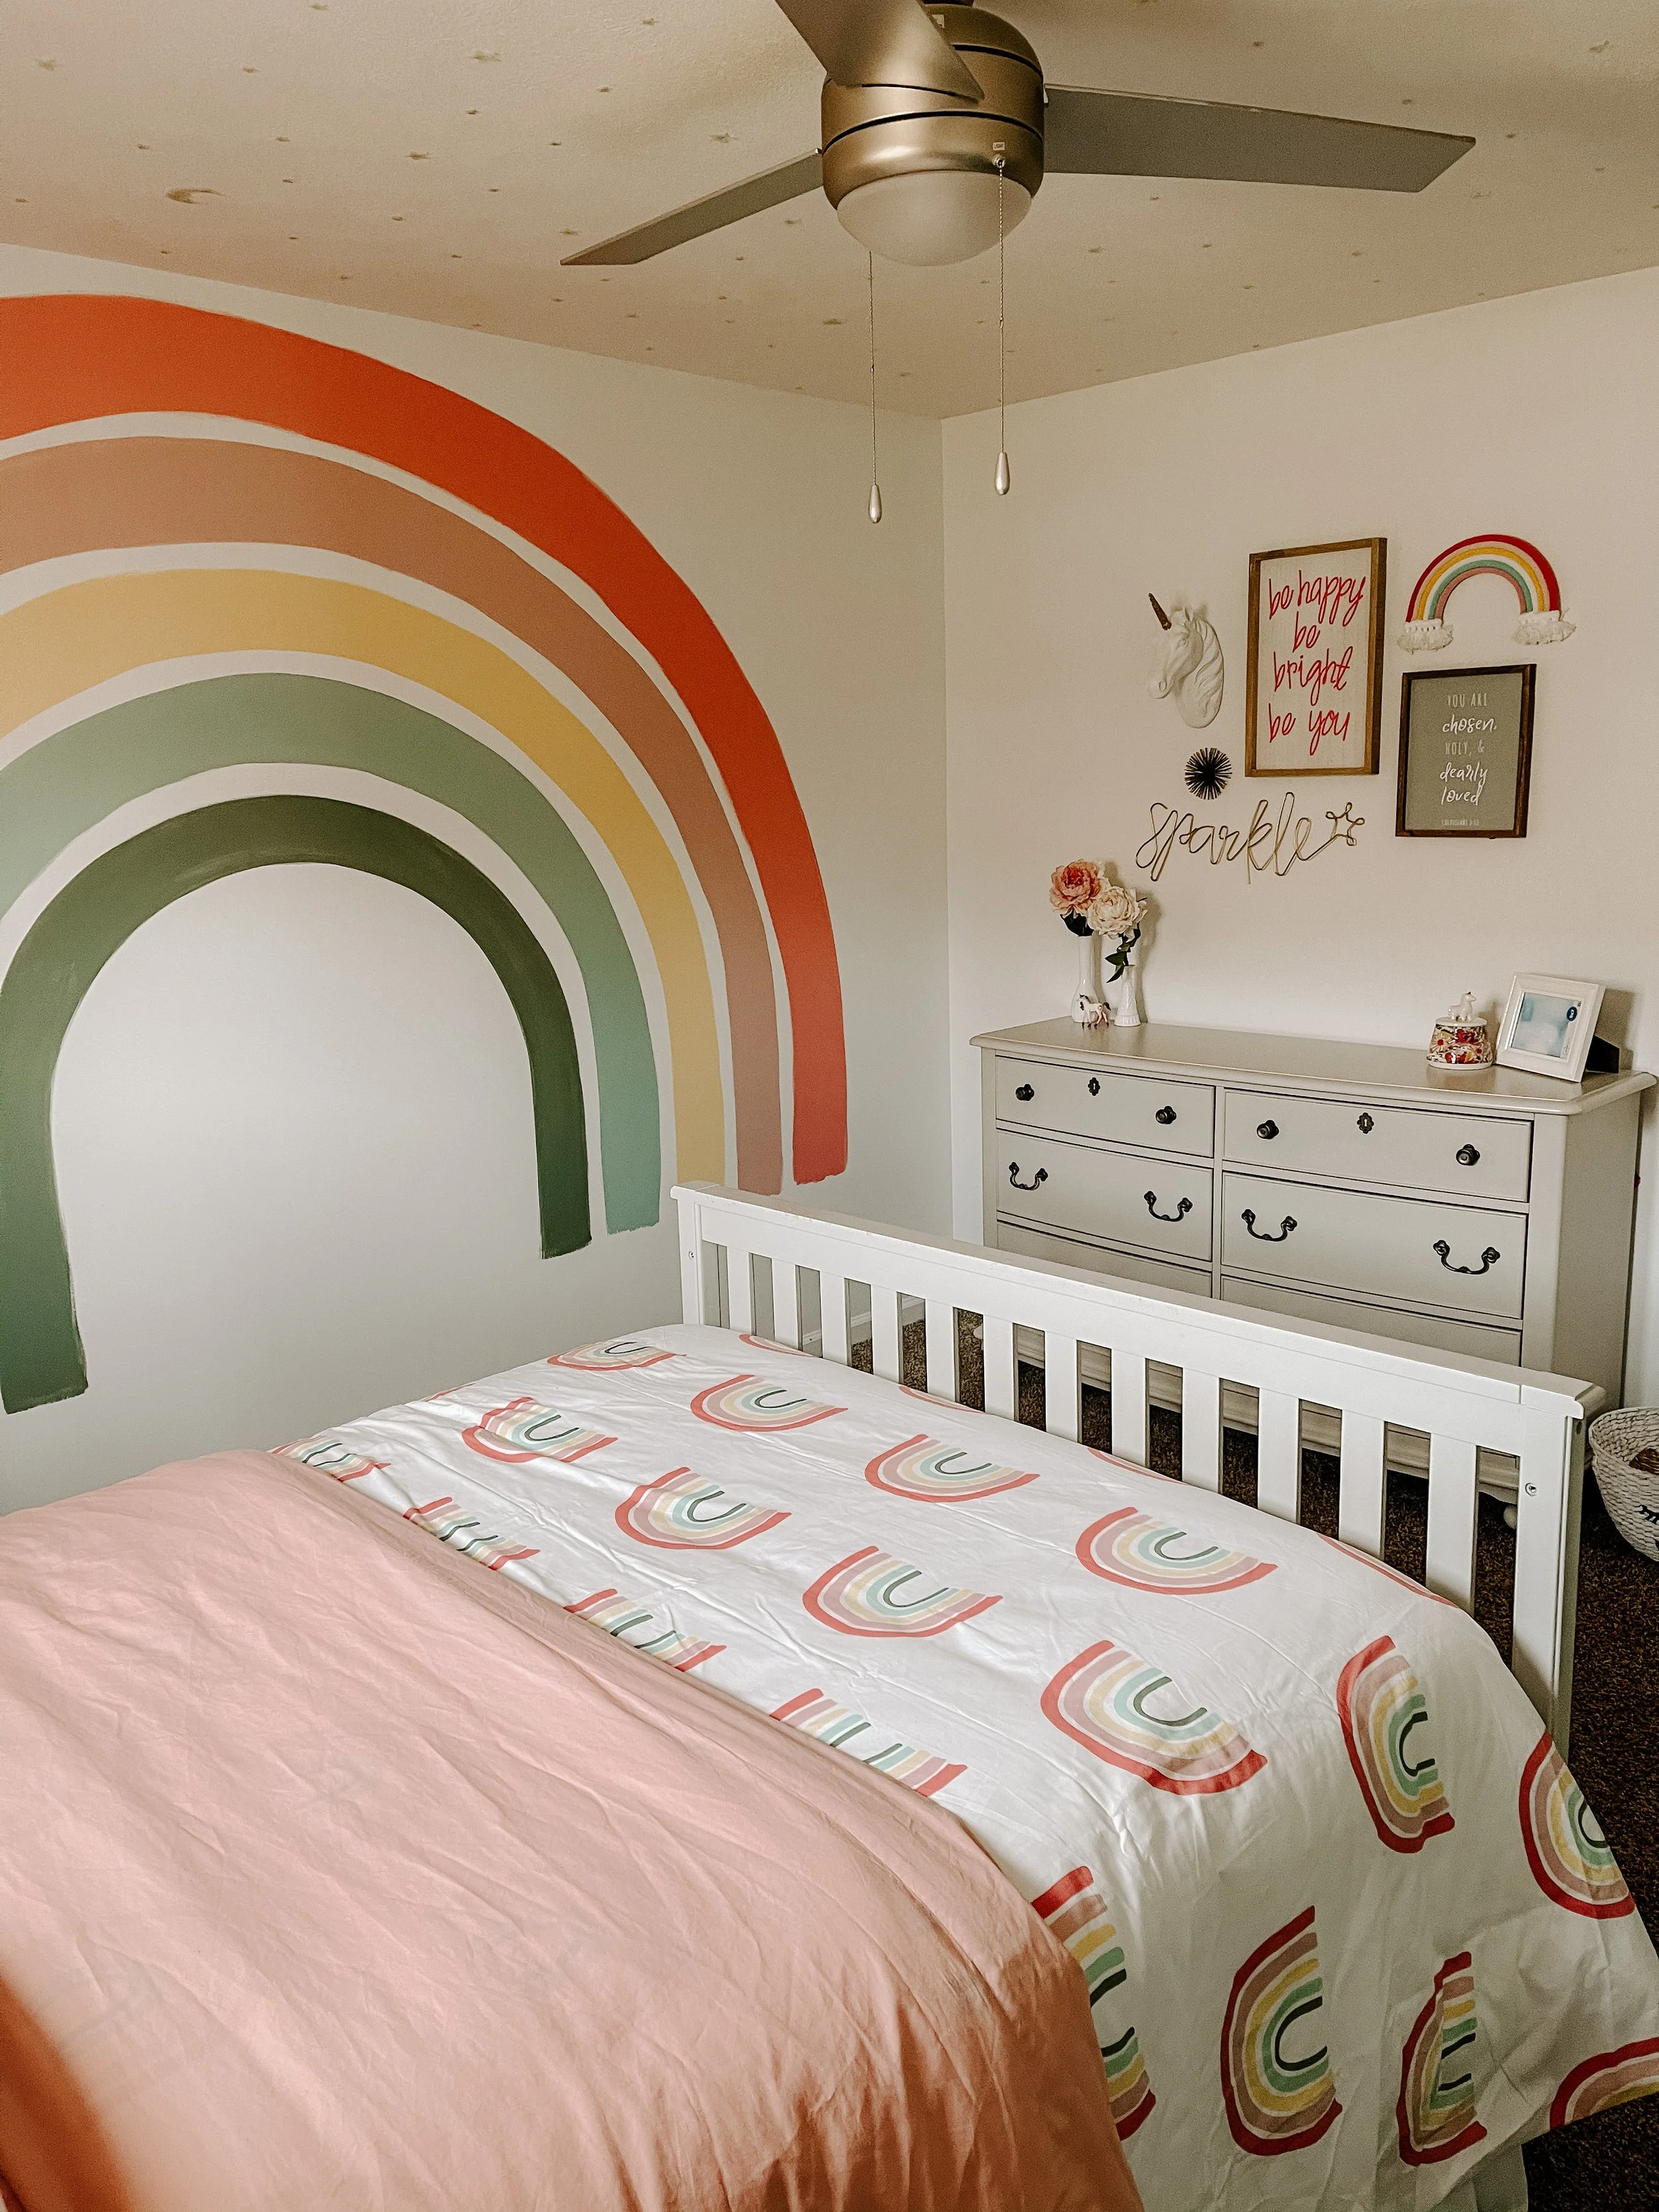
The room was beige, to begin with and I wanted it white - so first I painted the entire room white in a satin finish. While I painted, Chance began the wall treatment. We decided to do a board & batten accent wall so we could add hooks for storage and there would be a pop of color since all of the walls and trim were white. I couldn’t decide which color to paint the accent wall so I went to Instagram for help! I agreed with you all & decided on the green color!


Now it was time to begin the rainbow! I was cringing at the fact that I would have to draw on the freshly painted white wall. To get the rainbow I used a long piece of string, a pencil, a tape measure & a nail. I linked to my Instagram story highlight so you can see exactly how I did it. From here we measured the width of the wall and put a nail in the center where the bottom of the rainbow would be. I wanted the rainbow to fill the wall so I tied the string to the nail and the other side of the string to the pencil & took the pencil a few inches below the ceiling. Hold the string tight to the pencil & draw just as if you were using a giant protractor.
Once I had the first line drawn, I measured from the furthest point of that line to the nail and divided that by how many colors I needed & that’s how I knew how wide to make the color stripes. I wanted a few inches between the colors, so I took account of this too. Once I had all of the lines drawn, to “dummy proof it,” I wrote which spaces to paint because once all of the lines were drawn, it just looked like a bunch of stripes!


I used a 6” paint brush - I’d say a 4”-6” one would work great! I didn’t want harsh straight lines so I free-handed the lines. I like the “drawn” look, especially for a kids room! There were a few pencil marks/smudges that were left over, I just took a magic eraser to them once the paint was all dried.
the FINAL RAINBOW

Once everything was dried, I began to hang the decor. I purchased most of the decor for the room from Amazon, Target, TJ Maxx & Hobby Lobby. I have linked some of the same & some similar items from the rainbow room below. I wanted our daughter’s room to feel bright, and creative & a place where she would feel encouraged & inspired.
The weekend was finally over & it was time for the final reveal. When our daughter left for her weekend sleepover her room was bland & boring — when she came home, she had no idea that she would have a new room that fit her personality perfectly! Check out my Instagram story highlight to see her reaction when she saw her room for the first time! It’s priceless & a treasured memory for me!
the BEFORE


the REVEAL


SHOP the ROOM
I hope you found this post helpful! If you have any questions, please let me know! I’d love to see your spin on a rainbow bedroom, tag me on Instagram, @theshelbymiller! Happy creating!
xx - Shelby


